In the first part of this review I listed the new features of BibleWorks10 and looked at the Search Widow. In this part I take a look at the Browse Window.
The Browse window has also gotten a few new features. Here’s a look at its basic functions, what’s new, and how I use it.
Browse Window
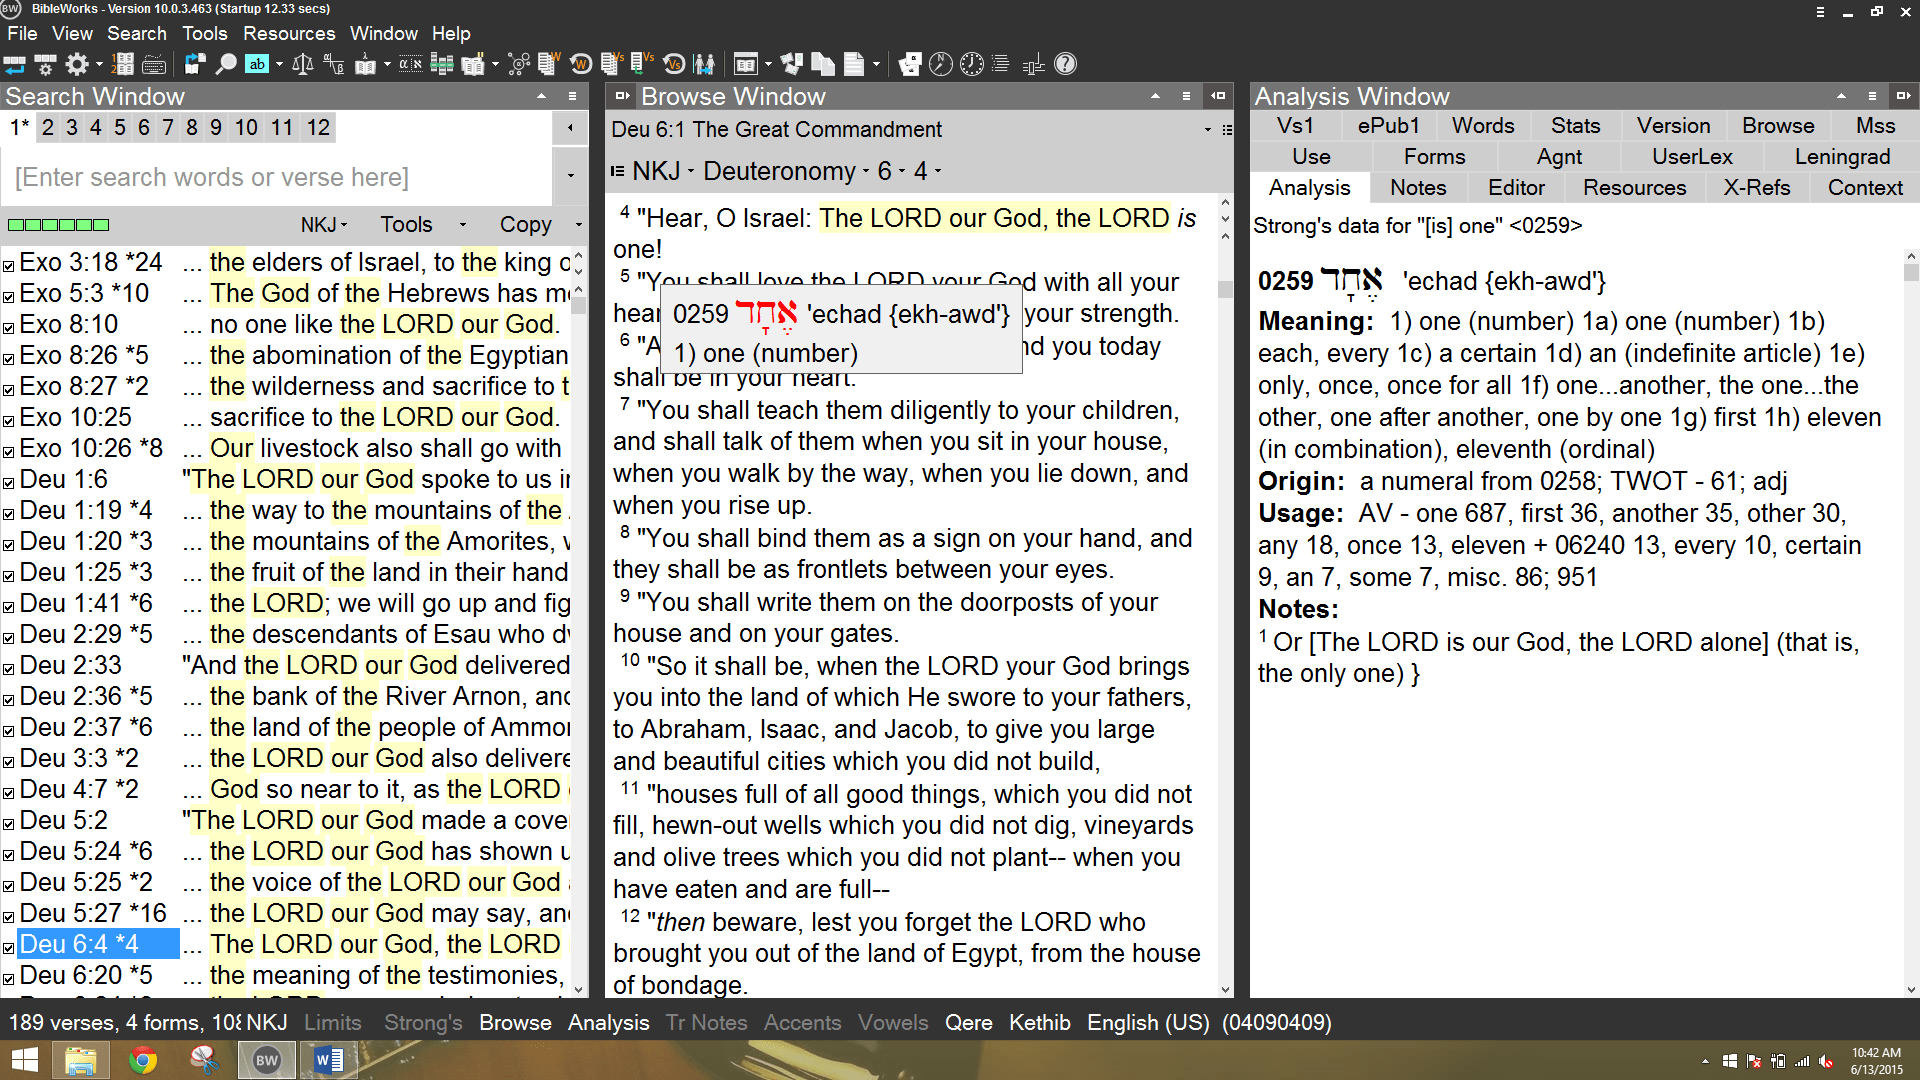
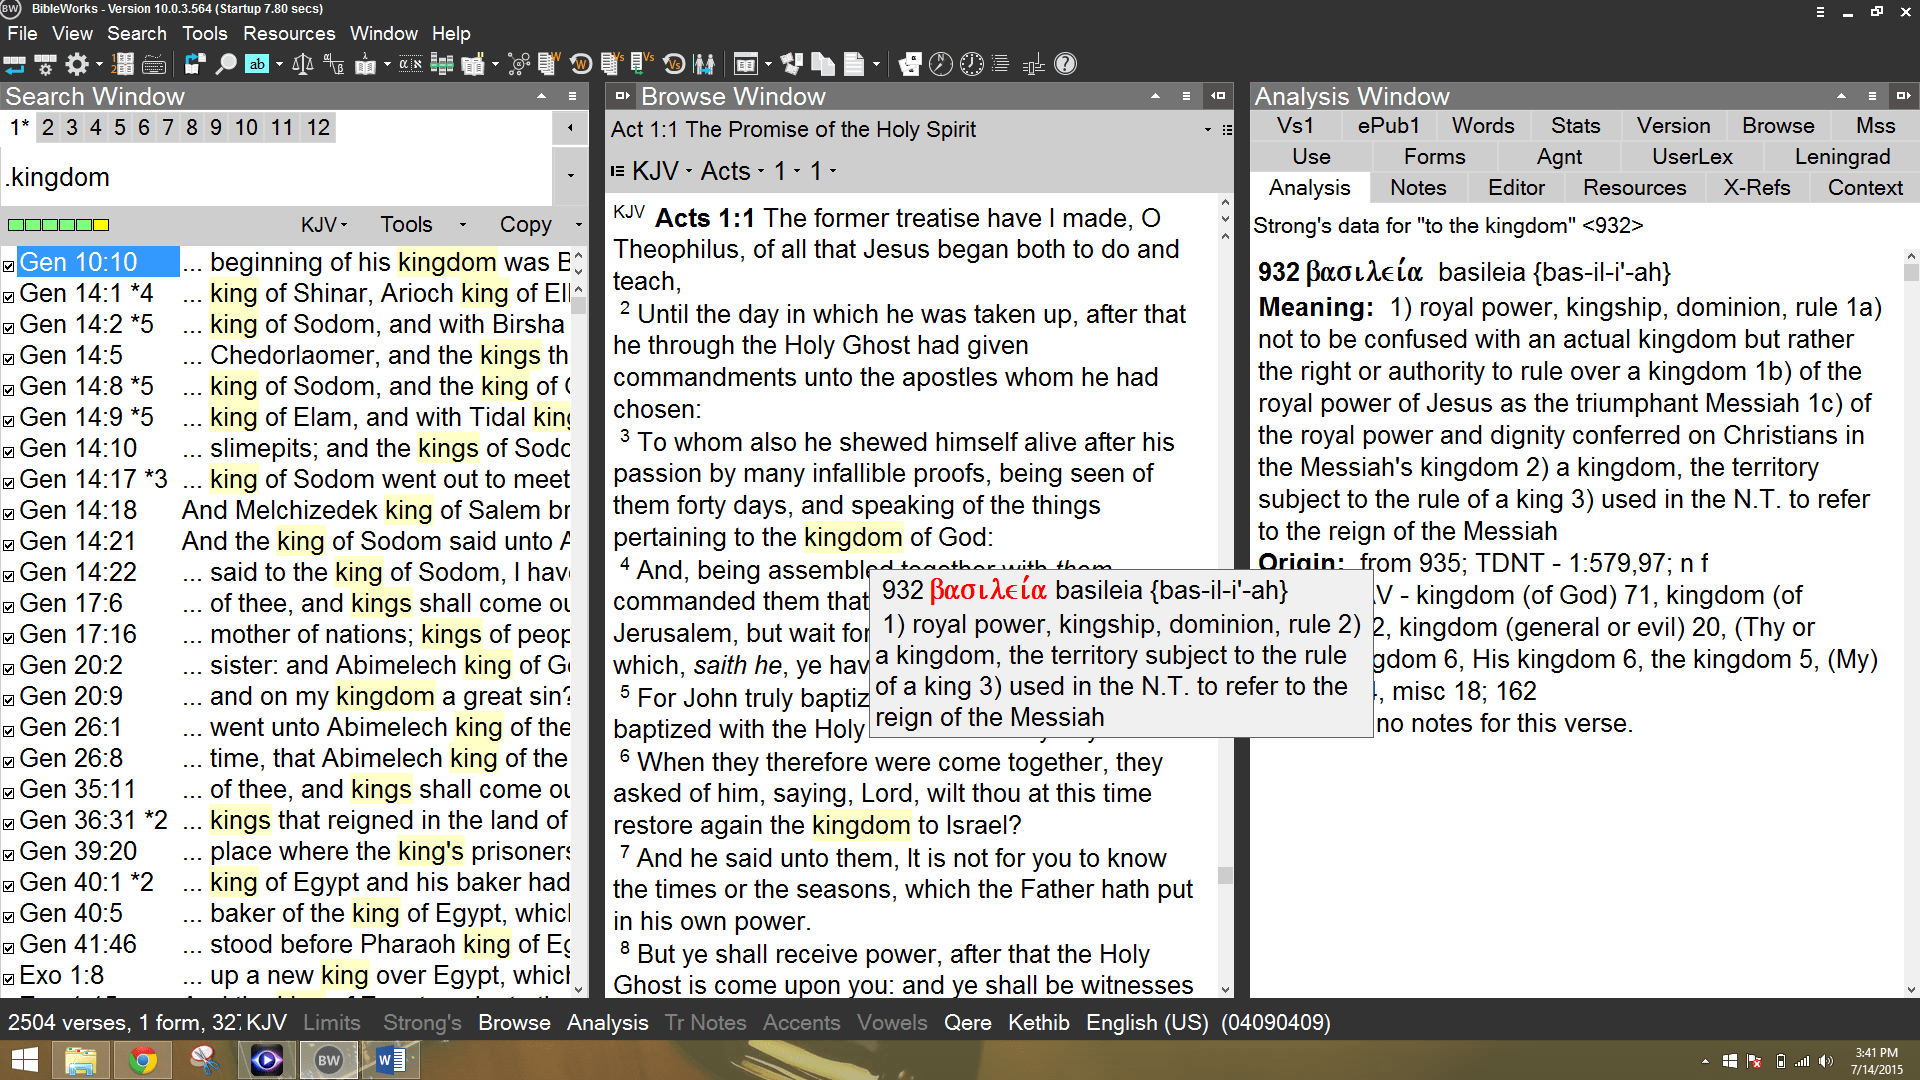
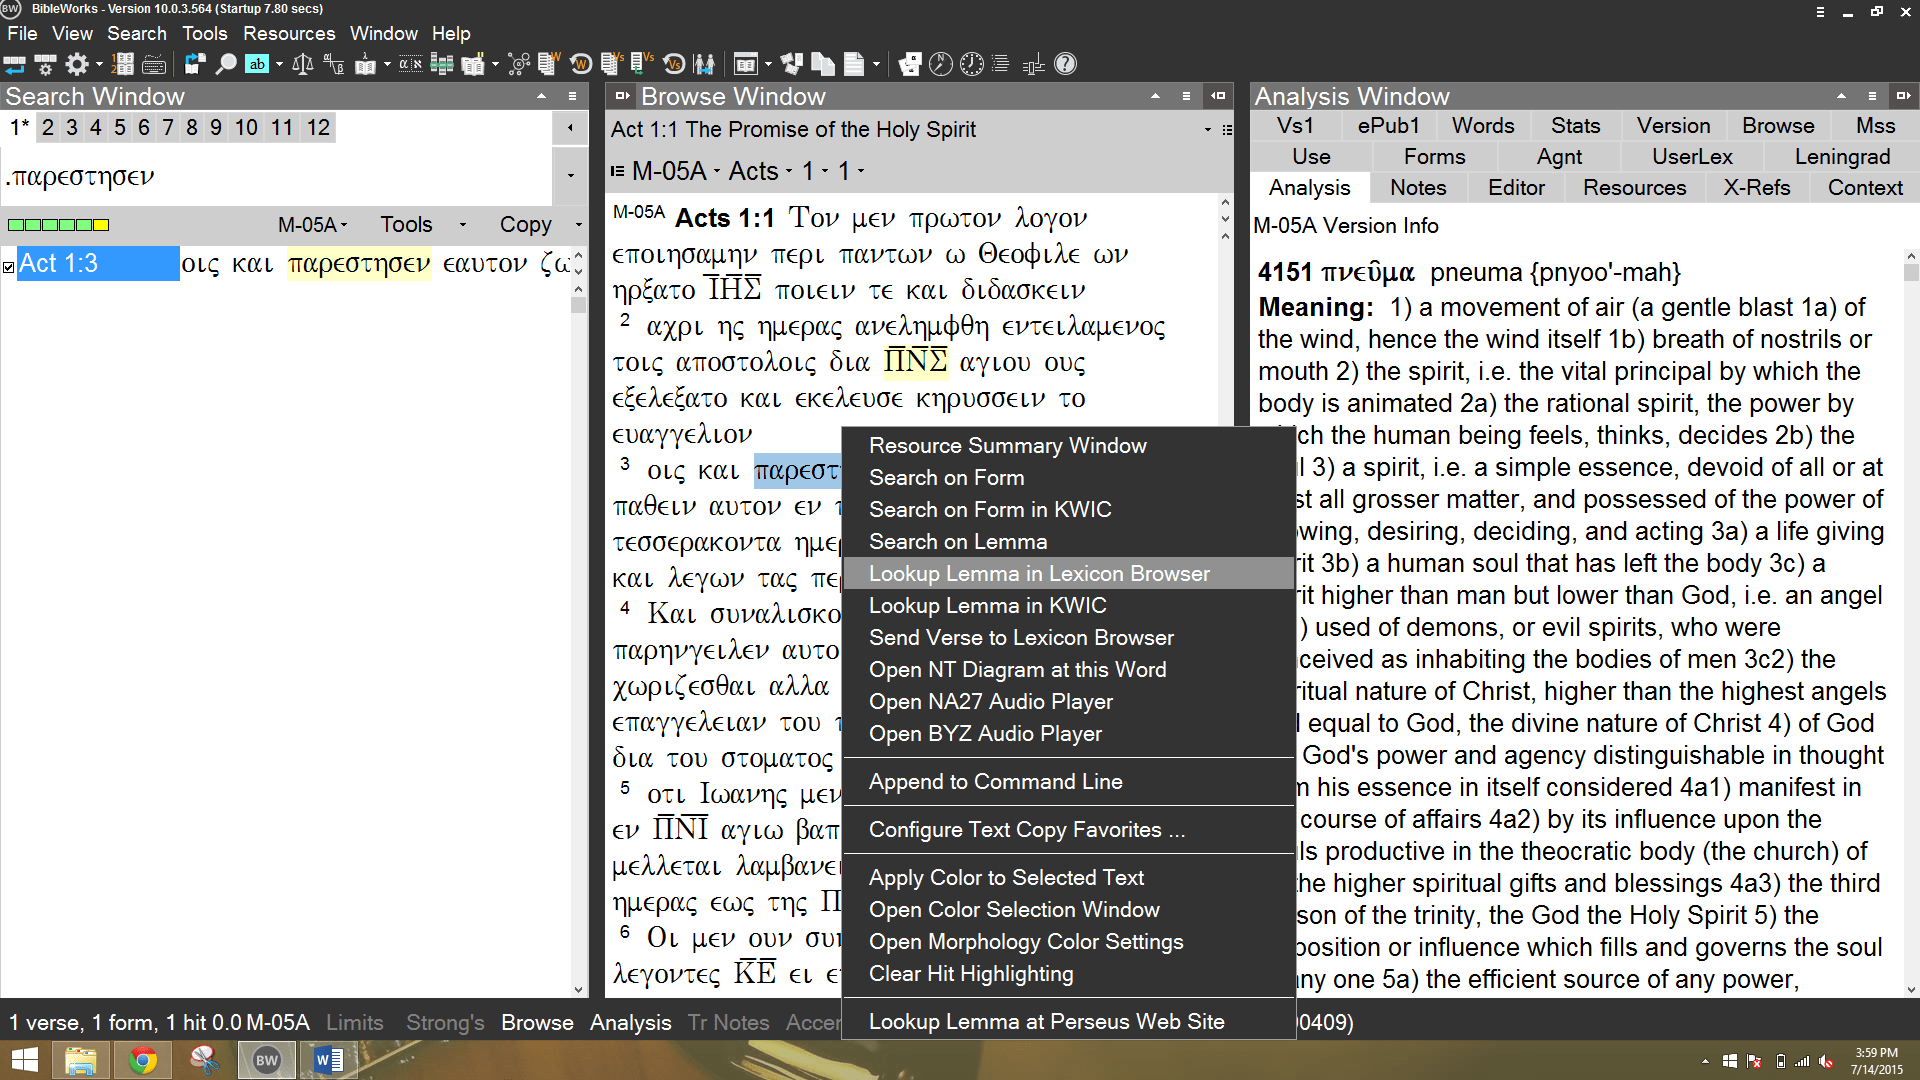
A lot of work can done in the browse window. You can view just a single version (called the search version) or you can see a single verse in parallel using as many translations as you want. My favorite feature is when you mouse over a word it gives you the definition from the original language. The definition is succinct. If you need more information the same definition appears in the Analysis Window but with a lot more detail. You can freeze it by holding the Shift key and moving your mouse over to the Analysis Window.
Multiple Version Mode

Another of my favorite features is Multiple Version Mode. This allows you to see any translation in parallel. The only thing is it will only show you one verse (unless one verse in one version corresponds to more than one verse in another. This is rare but it does happen). But, you can see it in as many translations as you want and you can still get the definitions and translation footnotes for each translation. The button quickly toggles between the two views.
Version, Book, Chapter, and Verse Selector
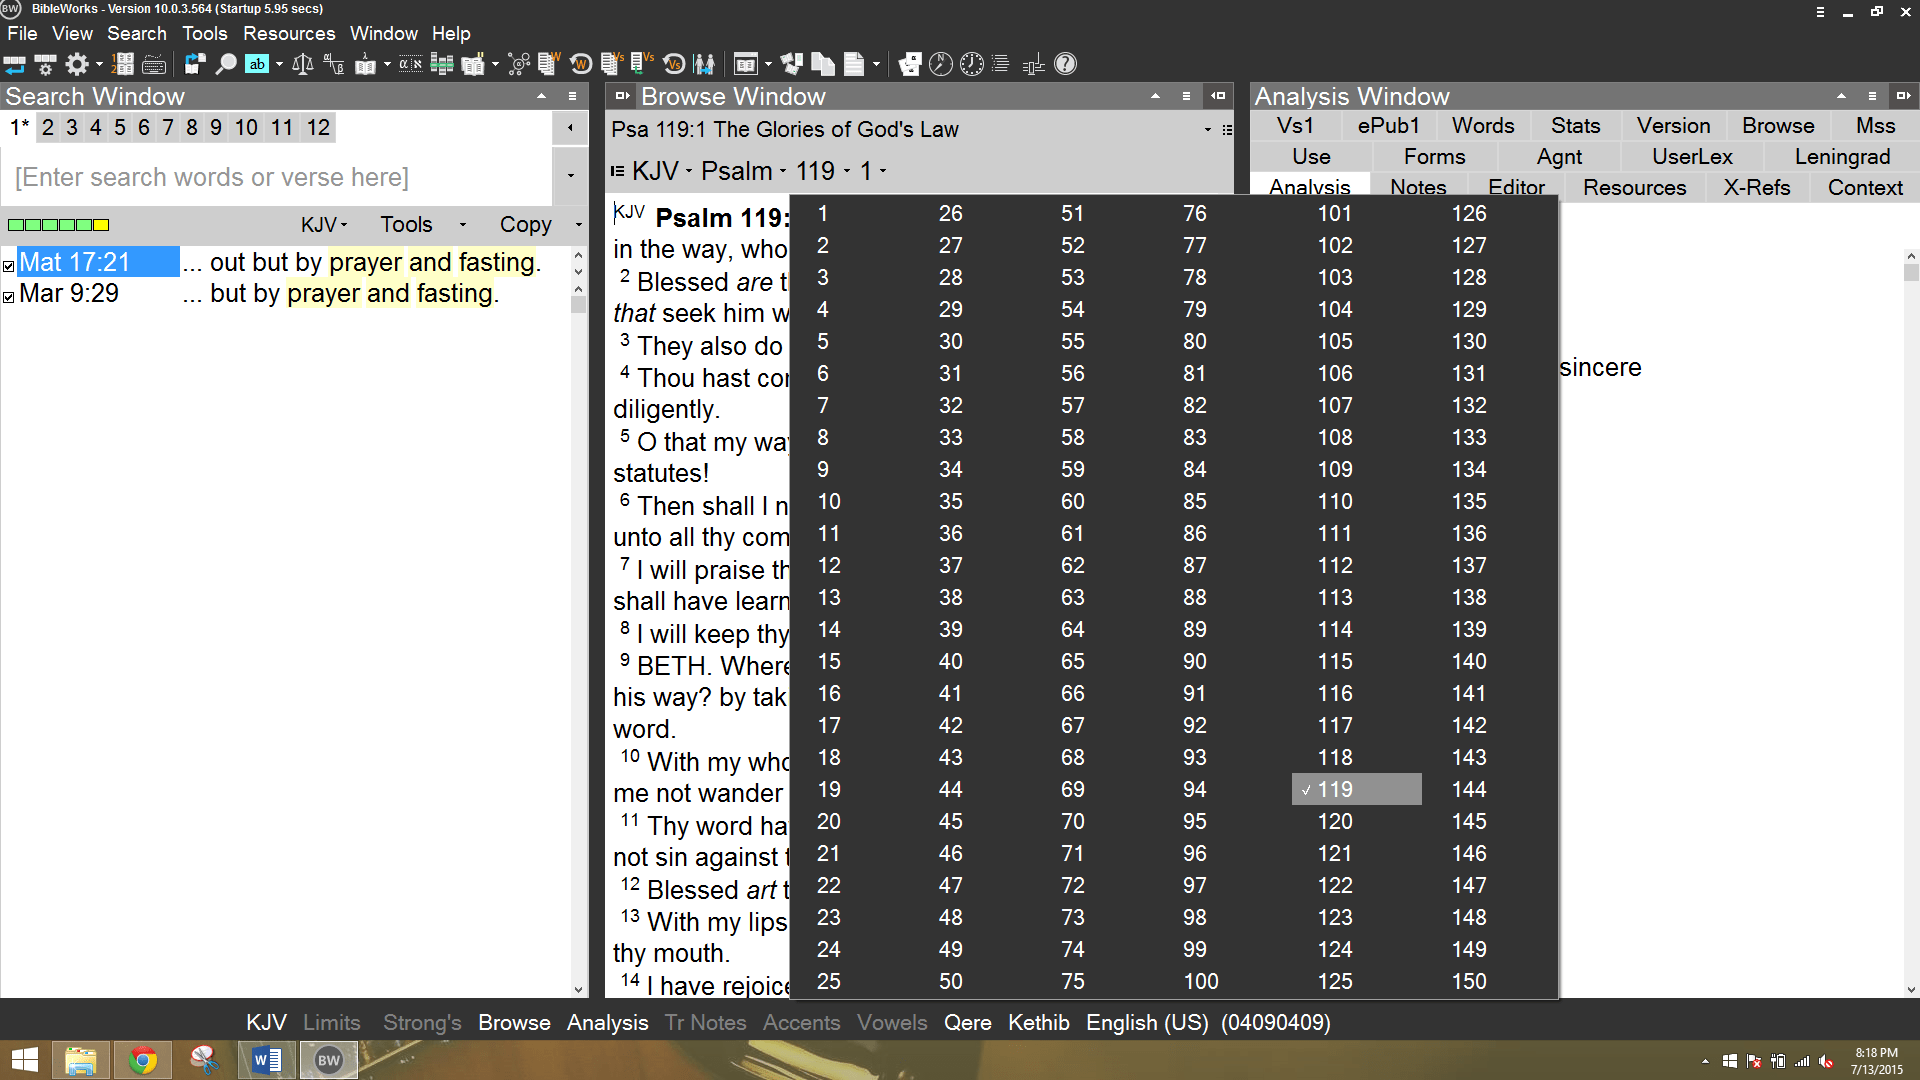
Navigation is done by drop-down lists. The verse selection window is easy to use. It seems faster than the previous edition. Selecting a book or chapter automatically selects verse 1. So if you choose verse 58 and then realize that you selected chapter 66 instead of 65, you can’t select chapter 65 and still be at verse 58. You’ll have to select the verse again. I do this occasionally and it’s a feature I would appreciate having. That feature could be there and I just don’t know about it. The navigation buttons can be toggled on or off. You don’t actually need it because you can navigate to any verse from the Command Line.
Searching from the Browse Window
You can do a quick search by double clicking on any word. This is great for searching for single words. This is handy because you don’t have to copy and paste into the command line and you don’t have to type anything. You can also search for phrases. For this you have to highlight the phrase, right click, and choose Search for Phrase. It’s not as easy but it still beats typing the phrase into the command line. It automatically performs an AND search with the words in exact order. Your search will appear in the command line.
It will also do fuzzy searches (I love fuzzy searching. I never thought I would type those words in the same phrase). Fuzzy searches bring in similar words. If you’re using multiple version mode, the command line automatically changes the search version to the version you clicked on. I’m really amazed at how fast the search works.
Outline Headings
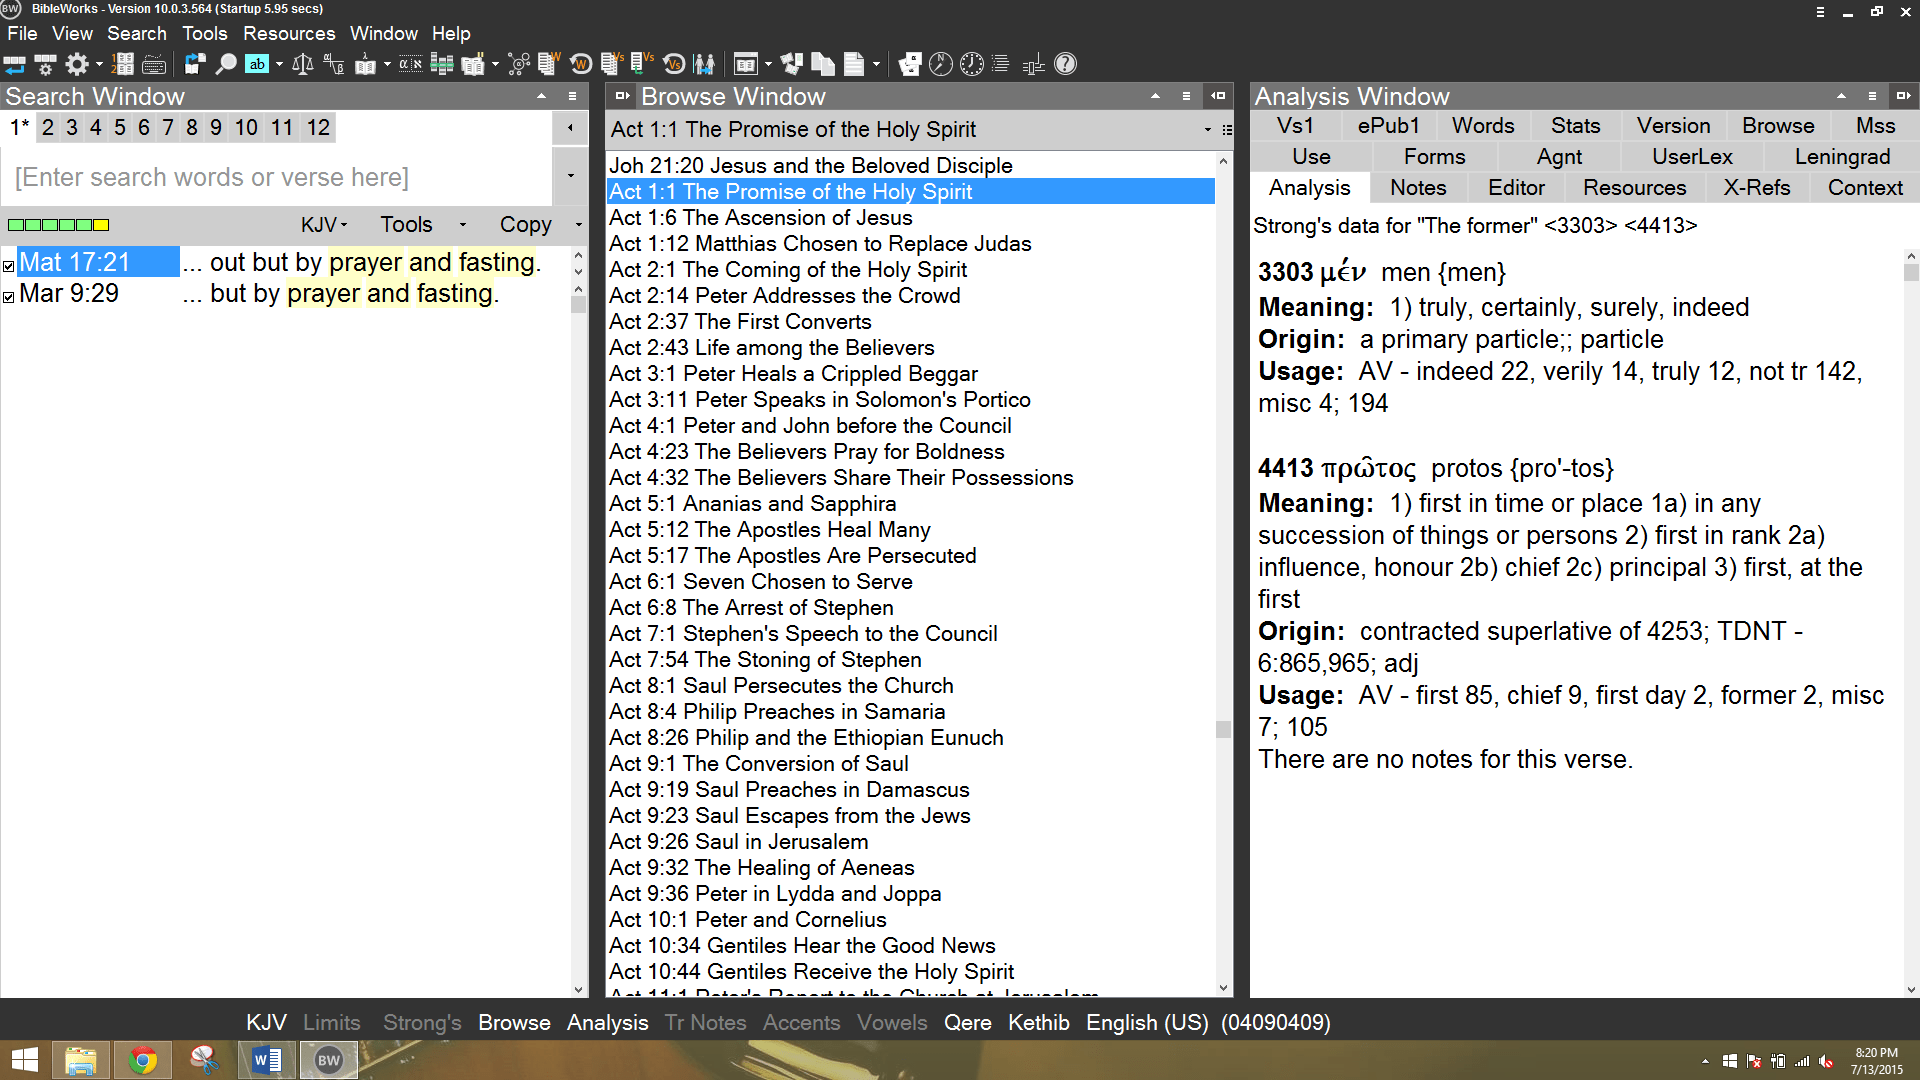
You can also select passages by their section headings. This is a drop-down box that appears above the book/chapter/verse chooser. When you select it the drop down box shows all of the section headings. The default headings are from the RSV.
You can choose a different outline by selecting the button to the right of the drop-down box. There are 14 outlines from different Bible translations including ESV, NIV, NLT, NET, and a few others. There are even a few in other languages. This is a good amount of outlines and they work well with any translation. I’d like to see NKJV added to this list since I use it often and it’s a popular translation.
Manuscripts
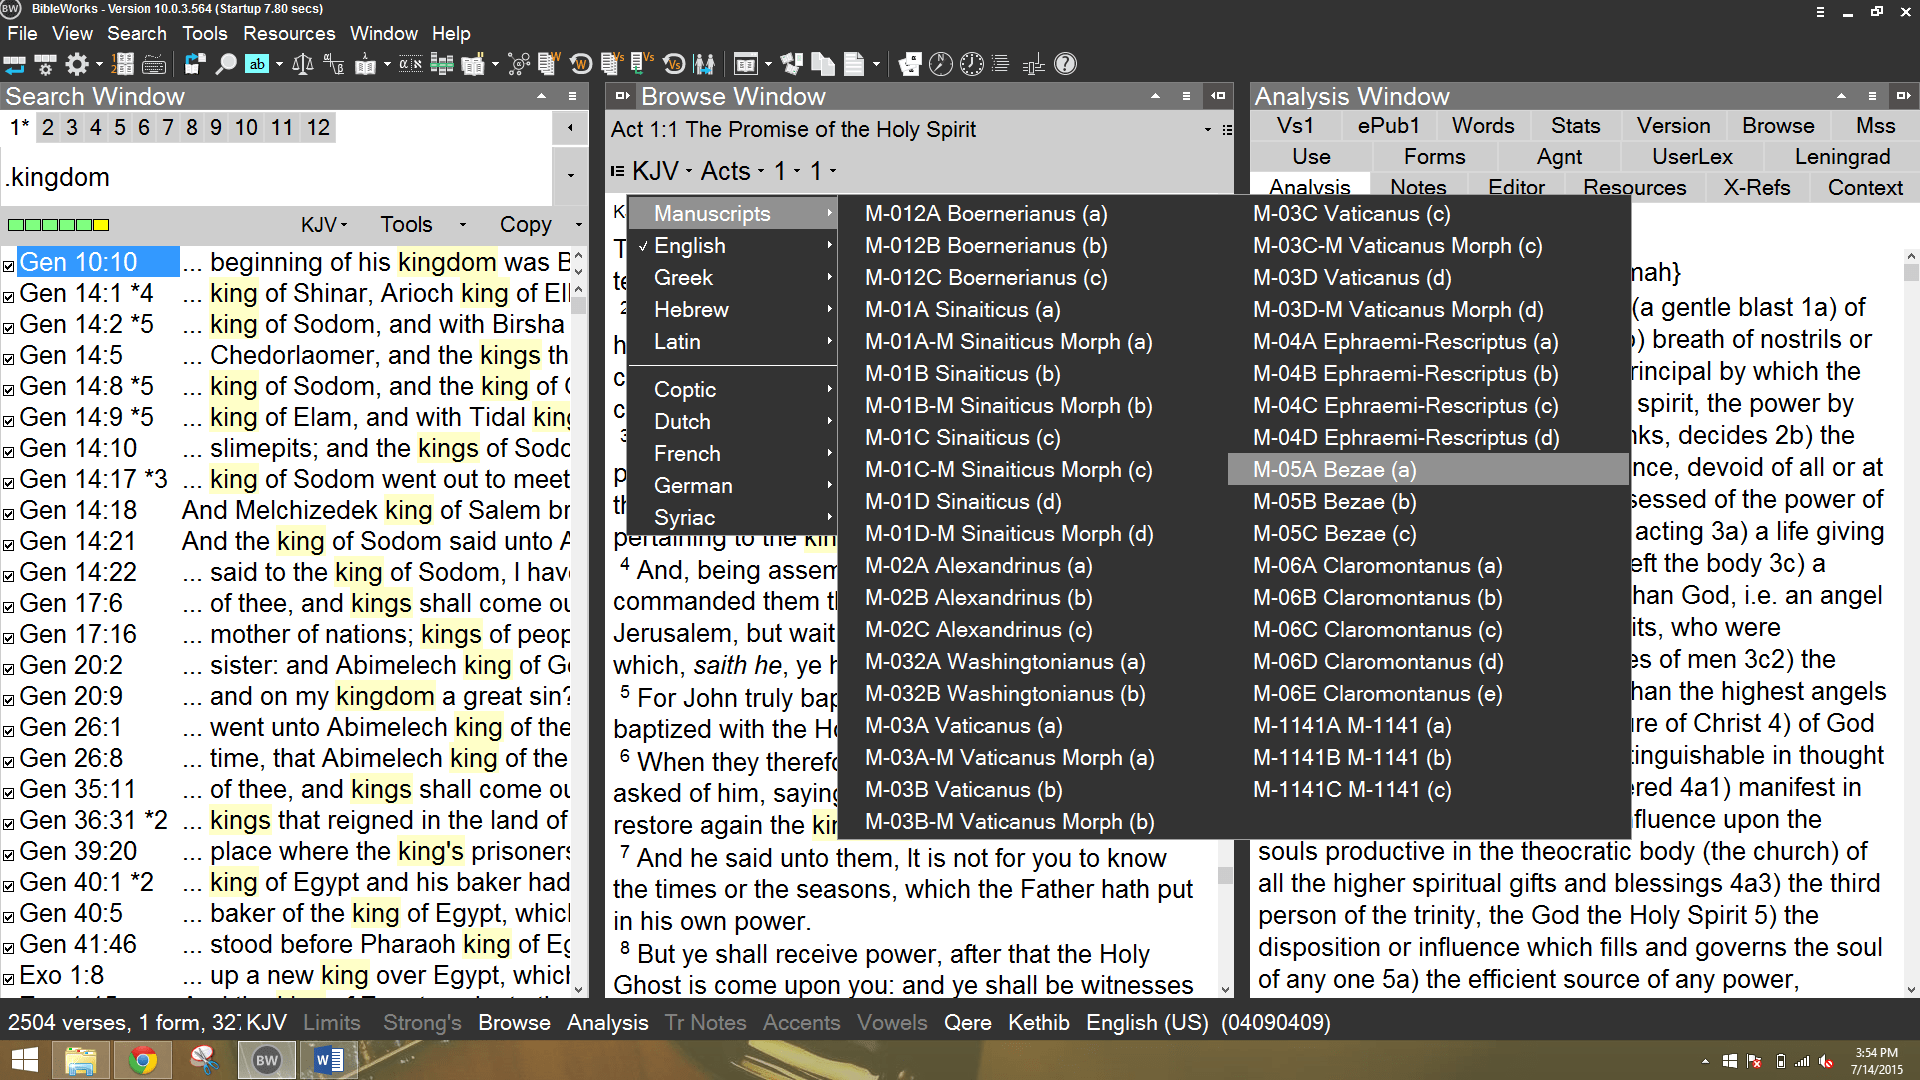
One of my favorite features of BibleWorks is the manuscripts. You can read from 39 manuscripts, perform searches, get information about words, apply colors, etc., just like you can with any other version of the Bible. This is one of the features that sets BW apart from the others.
You can do anything with the text that you can do with any other version. It’s great having these manuscripts at your fingertips.
Morphology Color Tagging

This lets you see the forms of the words in a verse. You can quickly see the verbs and nouns. Some are built in but you can also create your own colors and form tags by adding a new entry, choosing the original language version, and defining the form and the color. You can get the form types from the morphology code helper in the search box by typing .*@ and viewing the results in the suggestion box.

From here you can choose form types and make selections until you have the forms you want. For example, I selected verb, subjunctive, imperfect, active, 1st person, singular. My morphology code then is: vsia1s. You can also see these in the morphology code window. You don’t have to be this detailed. You can use * in any portion of the form. This will include all forms after the *. So if you want all verb forms you can just type v*. One thing I like is that you can save these as new files and create new morphology coding and switch between them. You can also toggle the color off if you don’t need them. This way you don’t always have to see them.
Copy a Verse or Passage
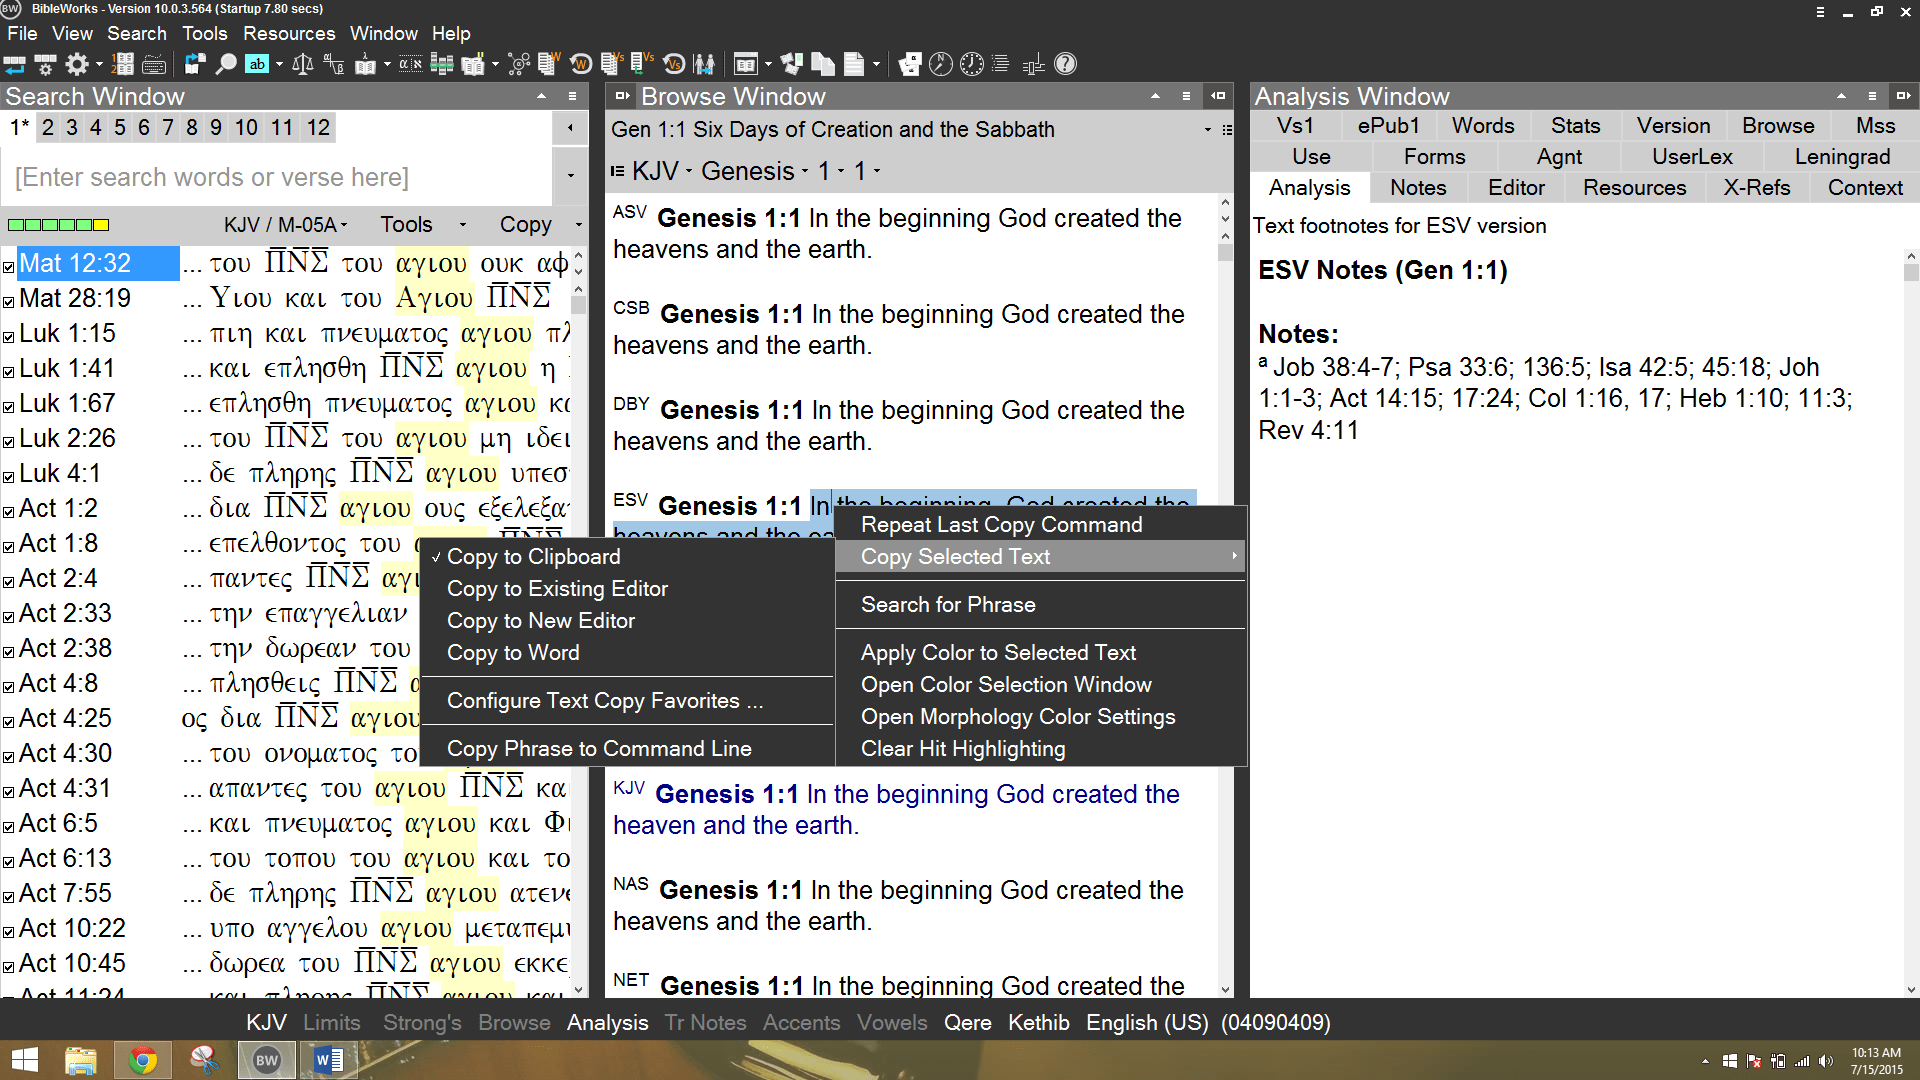
You have control over how copy and paste works. When you highlight a word or phrase, right click and mouse over Copy Selected Text and you can choose where the phrase is pasted. You can also set defaults.
You can also choose how it looks when it’s pasted. You can set the formatting to show the book name, chapter number, verse number, version name, etc. and where it’s pasted whether it’s in the clip board or another document. If you’re creating your sermon in Word, you can have it to automatically paste into Word just by copying. The editor is a good choice if you want your notes to be kept within BibleWorks.
I use BibleWorks every time I paste Scripture into anything whether it’s sermons, books, articles, forums, social media, etc. Every Scripture you’ve seen me post anywhere came from BibleWorks (unless it’s from a translation not found in BW – this does happen on rare occasions), including Bible Buying Guide and my books on Amazon. I’ve even thought about posting a graphic that says: Powered by BibleWorks. Okay… I’m designing that now.
Color Coding

You can apply colors to the text, background, or both. I like this because I enjoy color-coding Biblical topics. You can also apply bold, italic, underline, and strikethrough to the fonts. You can also turn the colors off, save or delete your color files, and import or export your color files.
This is good for personal study, sermon prep, and class prep. You can even use it for active reading. For example, you can highlight connections between cause and effect, pro and con, the speaker and the subject, the noun and the verb, and more. It’s also a useful tool if you preach or teach from BibleWorks. You can highlight the text you want to emphasize or discuss.
Toggle Strong’s Numbers

This displays Strong’s numbers within the text in the Browse Window. The main reason to do this is so they’re included when you copy and paste the text. This can be very handy in classrooms and group studies. If you just want to see what the numbers are it’s easier to mouse over the word and get the Strong’s number from the popup or in the Analysis Window.
Thoughts About the Browse Window
This is just scratching the surface with a few of the things you can do with the Browse Window. I mostly use it to copy portions of the text, view multiple versions in parallel, and see the definitions from the original languages. I also search from the Browse Window when I come across a word or phrase that I want to search quickly. Double-click searching is awesome.
In the next part of this review we’ll look at the Analysis Window. As powerful as the Search Window and the Browse Window are, the Analysis Window is where the real work is done. The Analysis Window is where BibleWorks10 shines the brightest.
See part 1 of this review here: BibleWorks10 Review Part 1 – New Features and the Search Window
Here’s Part 3 – BibleWorks10 Review Review Part 3 – The Analysis Window
To buy, upgrade to, or expand BibleWorks10, visit the BibleWorks store.
BibleWorks provided this software free for review. I was not required to give a positive review. My opinions are my own.


Trackbacks/Pingbacks